
BRAIDED PONY HOW TO

the BRAIDED PONY IS FOR ANYONe TRYING TO JAZZ UP A STANDARD PONY and wanting to look a little extra. the main reason I love a braided pony is it works with the majority of hair textures and face shape since its on the soft and romantic side. to create the right texture for this messy look make sure to try dry texture spray by aiir professional and dry texture mousse by aiir professional for the perfect texture no matter what your hair texture is like.
WHAT YOU’LL NEED:
HAIR ELASTICS
DRY TEXTURE AIIR BY AIIR PROFESSIONAL
FLEXIBLE HOLD HAIRSPRAY BY AIIR PROFESSIONAL
TAIL COMB
CURLING IRON
Now that you have all of your supplies, let’s get started!

Step 1:
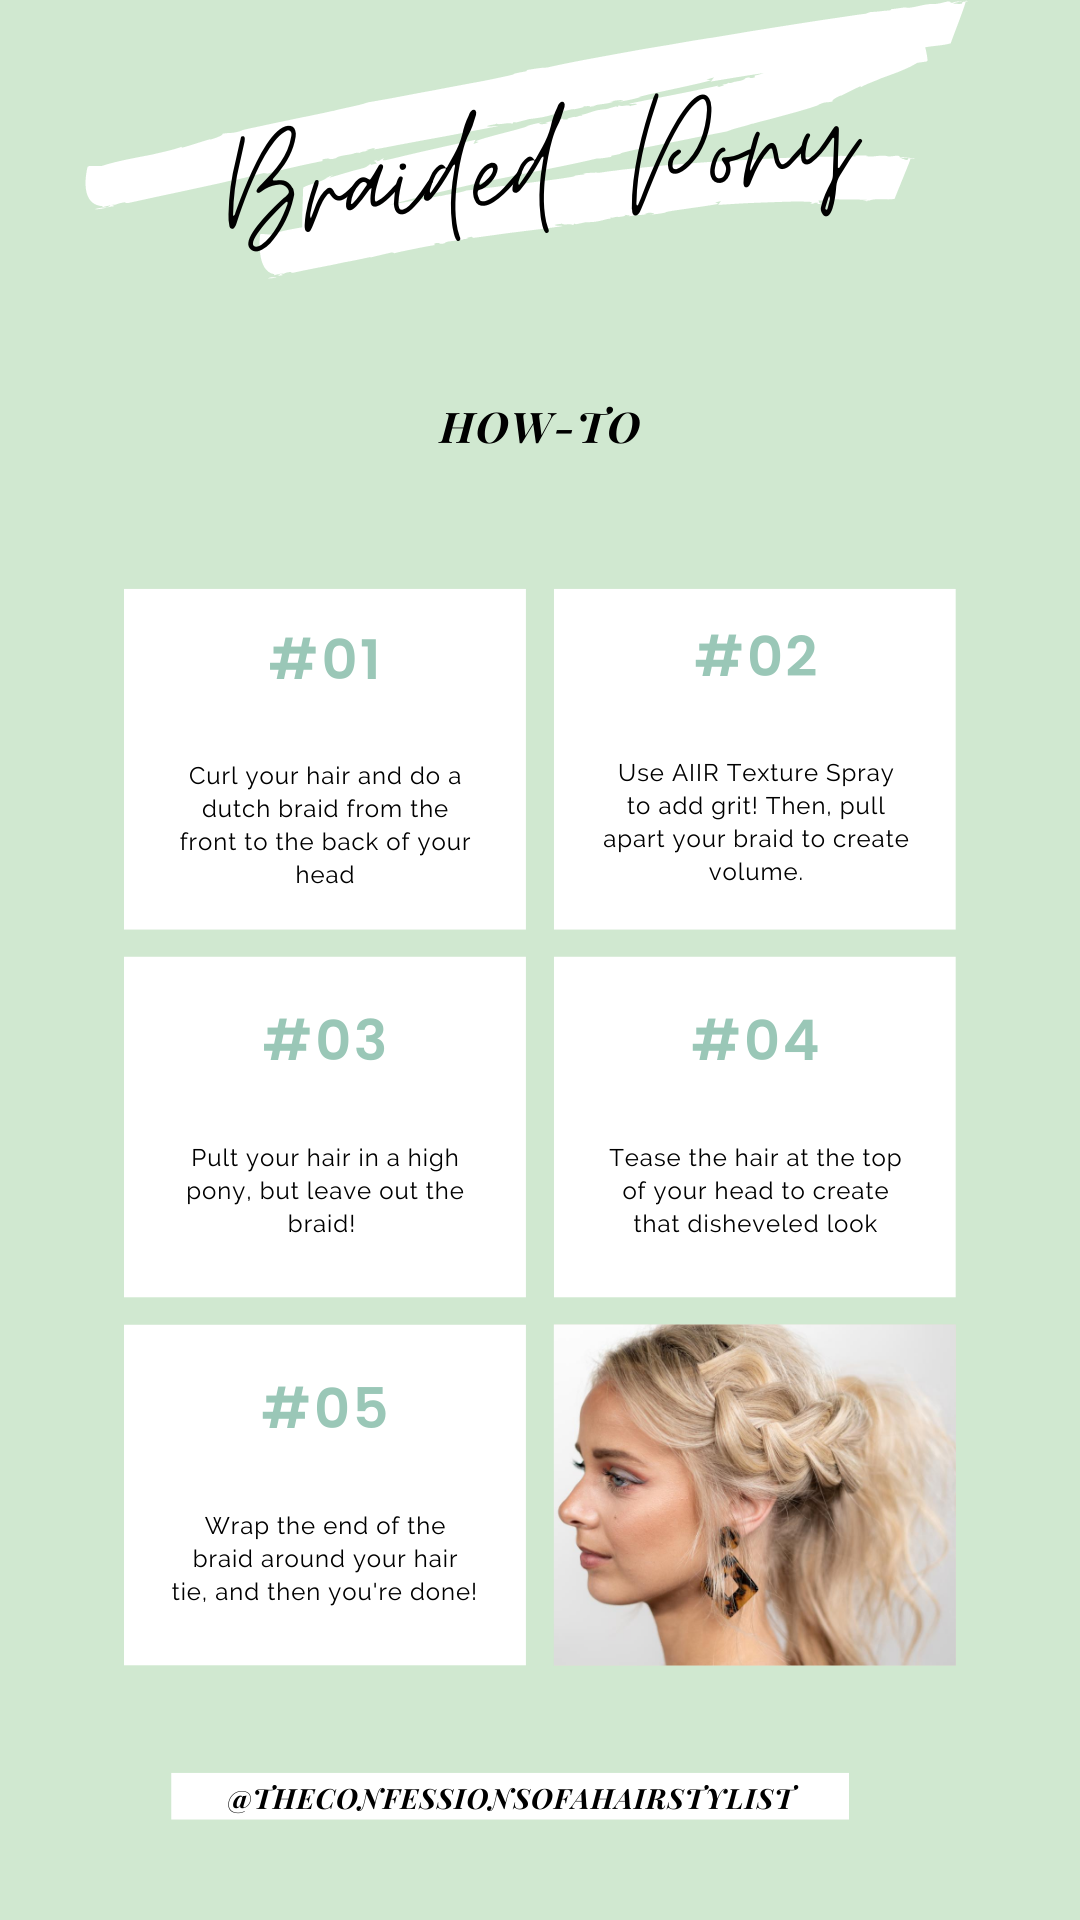
Start with curled hair. Then do a dutch braid, I always take a triangle section and divide it into three sections. If you need help with this step, you can watch my video tutorial below on this look to see a more in-depth look at how I do this braid! You’ll want to add hair from your left side, around your face. Continue this braid from the front of your face, all the way to the occipital bone. Then use a hair elastic to secure the braid in place!


Step 3:
Now, gather your hair up into a pony! Leave the braid out for now. Once you’re done gathering your hair, secure with a bungee (which I’ve been LOVING for ponies lately!) or a regular hair elastic.

Step 4:
Before attaching the braid, use your tail comb to tease the top of your hair to give you that gorgeous, perfectly messy “I woke up like this” look! Then pinch and pull your hair forward to really finish up that disheveled, but still gorgeous vibe!

Step 5:
Now take your braid, and use the hair that’s out on the bottom of it to wrap around your pony to hide the hair elastic. This will help extend the pony outward too! Once you’re done, secure the hair in place with some bobby pins.

Step 6:
Tease the hair at the root area of your pony with your tail comb, and then finish off the look with some Flexible Hold Aiir Spray! This product has rose quartz in it, which I absolutely love. This spray actually has some shine to it too so it really perfects your look!
And that completes the look! What I love about this Braided Pony is that you can really customize it to make it your own, you can make it look as polished or messy as you want! Make sure to check out the video tutorial below to get a more in-depth look at the tips and tricks I use to complete this Braided Pony.
For more tutorials like this, check out my Instagram @TheConfessionsofaHairstylist and feel free to tag me if you try this look! I can’t wait to see how amazing you guys look!
Until Next Time Babes!
Jenny